How to Change a Face in a Picture: A Practical Guide
You’ve got a photo that almost works, maybe a testimonial where someone blinked, a campaign image where the wrong talent ended up in the frame, or a product visual that can’t be published as-is because of rights or privacy. How to change a face in a picture is less about a trick than about a workflow, because the same edit can be technically convincing and still fail at consent, consistency, or release.
The useful way to think about it is simple. There are three paths, a manual mask-and-blend edit, an AI face swap, and a more controlled agent-native pipeline that keeps references, variants, and approvals attached to the asset. The technical steps change, but the responsibilities don’t, because every path still has to respect likeness, context, and disclosure.
If you want a quick map of the territory before you touch an image, face swap technology explained for marketers gives a useful overview of why these edits are used in brand work at all.
Table of Contents
- What It Really Means to Change a Face in a Picture
- The Mask-and-Blend Workflow You Should Understand First
- Running an AI Face Swap Without Losing Control
- Identity Drift, Artifacts, and the QA Loop
- When Realism Is the Wrong Goal
- Consent, Likeness Rights, and Platform Rules Built Into the Workflow
- Your Pre-Publish Audit Before the Image Goes Live
What It Really Means to Change a Face in a Picture
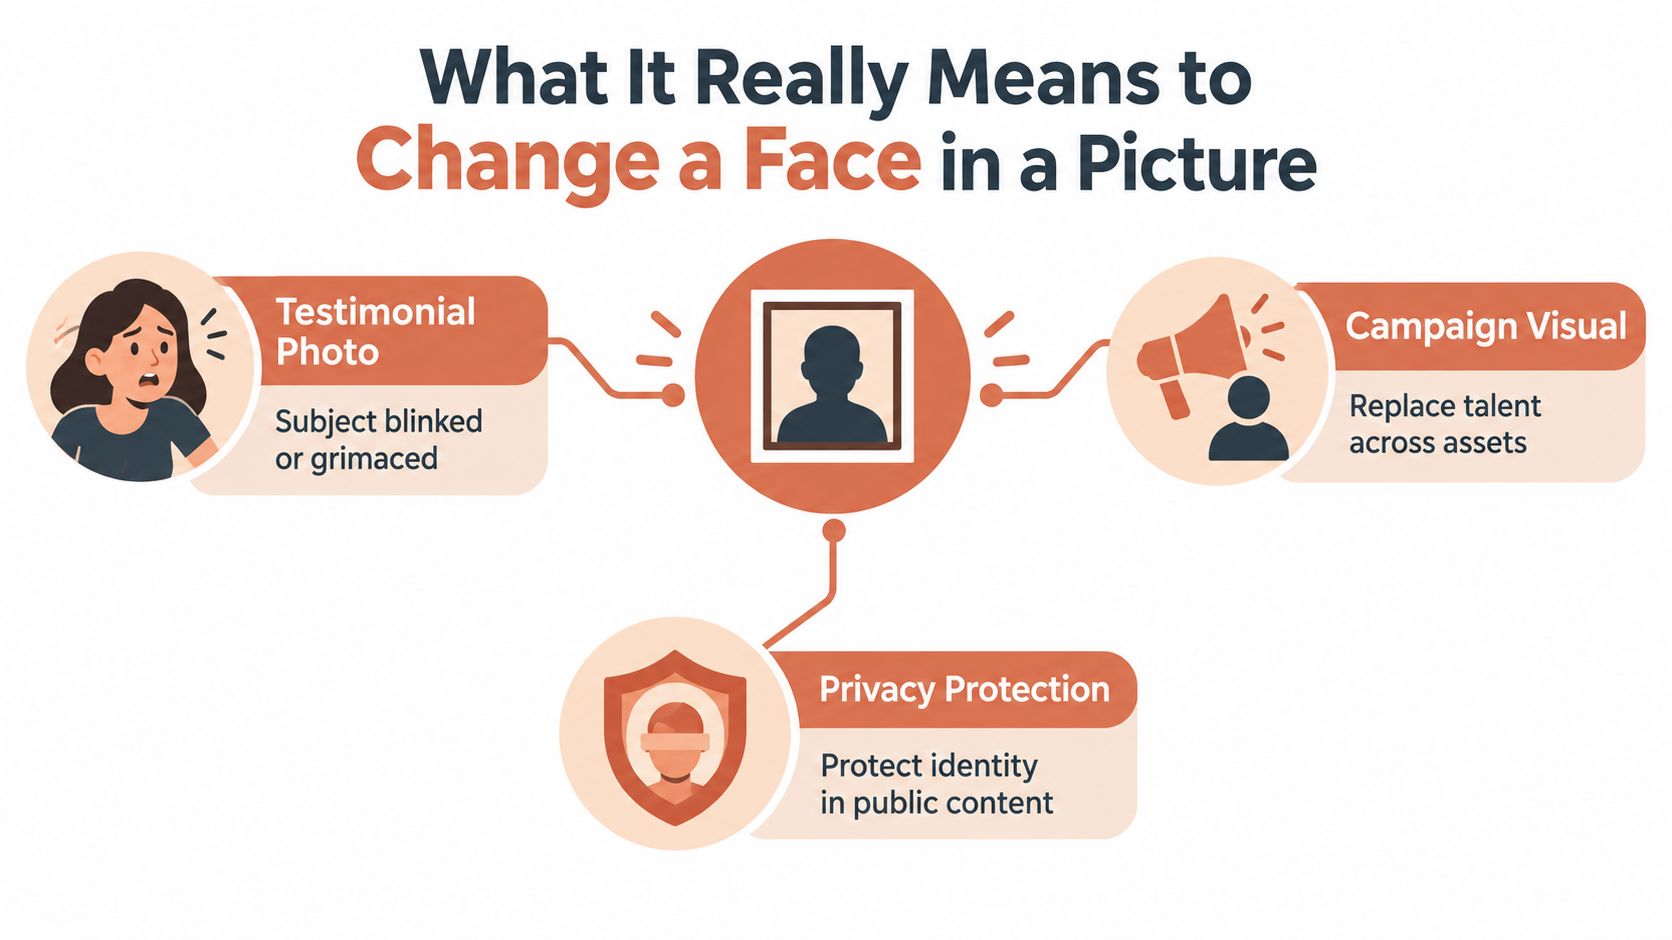
A face change starts with a business problem, not a filter. A subject flinched in a testimonial shoot, a regional campaign needs the same character across several assets, or a creator wants privacy without losing the mood of the shot. Those cases look similar on the surface, but they lead to different production choices.
Three paths, three assumptions
The manual mask-and-blend path assumes you have two images that are already close in angle, lighting, and expression, and you’re willing to tune the composite by hand. The AI swap path assumes the model can detect landmarks, infer alignment, and generate a plausible replacement faster than a retoucher can. The agent-native pipeline assumes you care about reuse, approvals, and version control, so the face becomes a managed character asset instead of a one-off edit.
Practical rule: if the image will be reused across ads, posts, or formats, treat the face like a brand asset, not like a disposable layer.
The technical history matters because every modern tool is still solving the same problem in a smarter way. Face replacement evolved from manual alignment into automated workflows, and the 2008 ACM SIGGRAPH paper “Face Swapping: Automatically Replacing Faces in Photographs” is a good milestone for understanding the shift toward landmark detection, alignment, masking, color matching, and compositing (facts.now on face swap technology). Earlier image morphing also became culturally visible much earlier, in the 1991 “Black or White” music video, where faces transformed sequentially in a way that foreshadowed today’s generative tools.
The takeaway is that convincing edits depend on pose, lighting, expression, perspective, hair boundaries, and skin texture. If those don’t cooperate, no amount of clever prompting will make the edit look trustworthy, or publishable.
The Mask-and-Blend Workflow You Should Understand First
Before any AI system does the heavy lifting, it helps to understand the old-school method it’s still trying to imitate. That workflow gives you the right mental model for source selection, alignment, and the places where a result usually breaks.
Start with the right pair of images
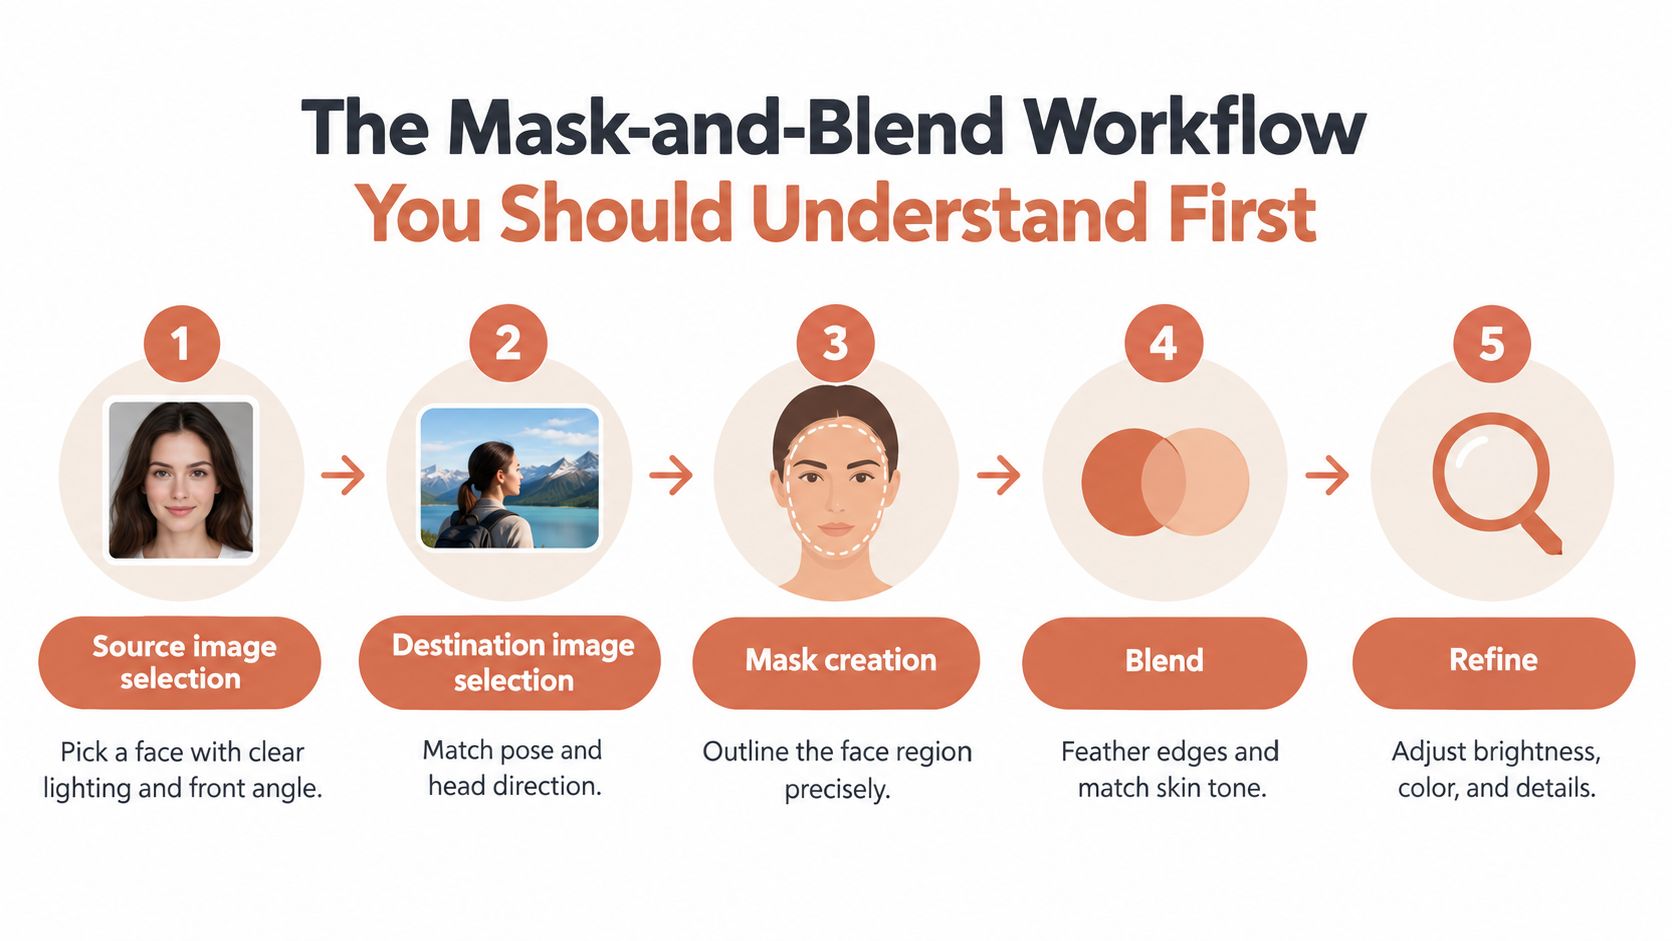
Pick a source face and a destination photo that already agree on the basics. Similar head angle, similar expression, similar focal length, and similar lighting will save you from fighting seams later. If the replacement face is shot from above and the target is straight-on, the composite will usually feel off even before you zoom in.
The workflow in a classroom or team photo is easy to picture. A teammate missed the shoot, so you want to replace one subject with a cleaner portrait of that same person. You first detect the landmarks around the eyes, nose, mouth, and jaw, then build a mask that covers the region you’re changing, then feather that mask so the edges don’t hard-cut into the target image.
Blend for continuity, not just coverage
The point isn’t to paste a face over another face. You’re trying to preserve continuity in skin tone, shadows, and edge detail so the new face belongs to the original scene. That means matching the illumination, protecting the hairline, and checking where skin crosses into collar, ear, or cheek boundaries.
A useful internal reference is a background-removal workflow, because the same discipline applies: edge quality matters more than surface speed, and the mask has to respect the subject’s outline if you want a natural result. If that sounds familiar, the logic is similar to the process in CreativeClaw’s background removal guide, where clean boundaries decide whether the final image feels deliberate or sloppy.
Alignment is the hidden bottleneck. Reported 2D landmark errors on the COFW benchmark are approximately 4.94% for LAB, 3.92% for AWing, and 3.45% for HRNet (ScienceDirect benchmark summary), which is enough to create visible drift when the face is small, tilted, occluded, or badly lit. That’s why even strong detectors don’t let you skip the human check.
Running an AI Face Swap Without Losing Control
AI tools are useful when you need speed, but the best results still come from treating the swap as a controlled edit, not a one-click surprise. The difference is whether you ask for a single polished render or a short set of candidates you can judge against the job.
Prompt the edit like a production brief
The prompt should describe four things clearly. Who the subject is, what scene they need to enter, what has to stay consistent, and what should be rejected. If the face must stay recognizable across a campaign, the prompt should say so in plain language, along with the pose, mood, and brand context that can change safely.
A character-led workflow is usually stronger than a loose “make it look better” prompt. In a CreativeClaw-style setup, you’d save the person as a reusable Character, attach reference assets, and let the assistant test variants from multiple engines instead of committing to the first glossed result. That keeps the same approved face present across images and video frames, which matters more than chasing the most photoreal rendering in a single frame.
Variants beat retakes
Don’t ask for one output and hope it lands. Ask for a small set of variants, compare them side by side, and choose the version that preserves identity while respecting the scene. That’s usually cheaper than discovering a bad crop, an odd mouth shape, or a lighting mismatch after the asset is already in review.
Brand kits help here too. If the same face needs to live inside a campaign system, keep the style rules, color palette, and reference image with the asset so the model doesn’t invent a stranger who just happens to share the haircut.
Red flags that call for manual rescue: a changed nose bridge, mismatched ears, flat or broken teeth, drifting eye shape, and skin texture that stops abruptly at the mask edge.
If the output only looks good when you squint, it’s not ready.
Identity Drift, Artifacts, and the QA Loop
The render is not the finish line. It’s the first draft of a quality check, and face edits need their own review pass because identity can drift even when the image looks clean at a glance.
What to inspect every time
Look at the image at 100% and again at final output size. Check the eyes, teeth, ears, hairline, jaw, and the skin where the mask boundary crosses the face. You’re looking for asymmetry, pasted-looking ears, doubled features, and texture that changes abruptly between the original photo and the inserted face.
Then simulate the publishing path. A file that looks tidy on your desktop can pick up halos or compression noise after social upload, so recompressing through the platform pipeline is part of the job, not an afterthought. The version that survives that roundtrip is the one you can trust for distribution.
| Failure mode | Likely cause | First check | Fix direction |
|---|---|---|---|
| Asymmetric pupils | Landmark drift or poor source angle | Zoom into the eyes | Regenerate with better alignment |
| Malformed teeth | Over-aggressive synthesis | Open the mouth area at full size | Choose a softer expression |
| Pasted ears | Weak blending near side profile | Inspect ear edges and shadows | Use closer head angles |
| Texture crossing the mask boundary | Mask too tight or poor feathering | Trace the face border | Widen the blend zone |
| Halo after upload | Compression or platform recompression | Recheck the exported version | Export a cleaner master |
Identity QA matters even more when the same person appears across many assets. A character consistency workflow, like the one discussed in CreativeClaw’s benchmark notes, helps flag drift before a campaign starts to splinter visually. The practical habit is simple, compare at least three variants, pick the one that stays closest to the approved reference, and reject the prettiest result if the identity slips.
When Realism Is the Wrong Goal
A hyperreal face edit is not always the smartest outcome. For many campaigns, a stylized or anonymized composite is safer, clearer, and easier to keep on brand than a render that tries too hard to imitate a real person.
Choose the level of realism on purpose
If the subject is a customer, a child, an employee, or someone pulled from a social post, maximal realism can create avoidable risk. A faceless mannequin shot in an e-commerce lookbook may be more honest and more reusable than a near-perfect likeness, and a regional ad can benefit from a consistent illustrated character rather than a deepfake that only works in one country or one format. In creator content, a recurring illustrated avatar can outperform constant visual reinvention because the audience recognizes the character, not the face detail.
That’s why “best” is context-dependent. In some briefs, the right answer is not a better swap. It’s a lower-fidelity image that’s clearly styled, clearly labeled, and easier to publish without confusion.
If you want a reference point for a more deliberate character workflow, this realistic AI character process example shows how consistency can matter more than raw photorealism. The same thinking applies here, because a recognizable system often beats a perfect but fragile face replacement.
Use style as a guardrail
Stylization can also reduce the legal and reputational load. When the audience should never mistake a composite for a real event, a less literal image gives you room to communicate without pretending. That choice pairs naturally with consent and disclosure, which makes the next step much cleaner.
Consent, Likeness Rights, and Platform Rules Built Into the Workflow
Consent belongs in the editing checklist, not in the legal folder nobody opens. For this kind of work, consent should be informed, specific, voluntary, and current, because a yes for a portrait doesn’t automatically cover every later use or every later format.
Ask four questions before you publish
Who is the face being used. Where will the edited image appear. Is the use commercial or editorial. Could a viewer mistake the composite for a real event. If the answer to the last question is yes, slow down and treat disclosure as part of production, not as a last-minute caption.
Some uses carry higher risk than others, especially when a face appears in an ad, an impersonation scenario, or a context involving children or public figures. For a deeper legal framing around using someone’s likeness, it helps to read guidance that treats likeness as a publishing issue, not just an editing one.
If you wouldn’t be comfortable defending the image in front of the subject, don’t ship it without written approval.
A fast decision tree helps teams move without guessing:
- Own or licensed image only if the face will be edited for public use.
- Written approval required if the subject is recognizable and the use is commercial.
- Label or disclose if the composite could be mistaken for reality.
- Do not publish if the edit implies endorsement, impersonation, or a false event.
This is also where a managed workflow can help. Consent fields, usage-intent prompts, and export labels keep the approval trail attached to the asset, so the team doesn’t have to reconstruct the decision later.
Your Pre-Publish Audit Before the Image Goes Live
Right before launch, run a short audit and don’t skip steps because the image “looks fine.” First, confirm that you’ve got documented consent and the intended use matches the approval. Then keep the source files, the model or tool choice, and the main settings with the export, because provenance is part of the asset’s history.
Check the face at output size, then zoom in on the eyes, teeth, ears, and skin tone. If the composite will go through a platform upload, run it through the same compression path before final sign-off so you can catch halos, banding, or boundary artifacts while there’s still time to fix them.
If the image could mislead a viewer, add a clear label or contextual cue. If it’s meant to remain a recurring approved character, store the reference image and export metadata in a durable place so the same face can be reused later without reopening the rights conversation from scratch.
CreativeClaw gives marketing teams a way to keep face edits tied to the rest of the asset workflow, with reusable character references, variant generation, and permanent asset URLs. If you’re building campaigns where identity, approval, and reuse all matter at once, visit CreativeClaw and see how a controlled editing workflow can keep the image useful after the preview pane.
Ready to try it?
Connect CreativeClaw to Claude in under a minute.
Get StartedContinue the workflow