How to Convert a PowerPoint to Video: A Step-by-Step Guide
You’ve got the deck open, the last slide looks polished, and now someone wants it as a video instead of a file they have to click through. Maybe it’s going to YouTube, a course platform, a sales follow-up, or a social post. The good news is that how to convert a PowerPoint to video is usually less about editing and more about making a few smart production choices before you export.
PowerPoint already gives you a built-in path from slides to a portable video file, so you usually don’t need to rebuild everything in a separate editor. The catch is that the conversion works best when you treat it like a small pipeline, not a single click. If the timing is off, the narration is rushed, or the export settings don’t match the destination, the result feels like a slideshow pretending to be a video.
Table of Contents
- Why Turn a PowerPoint Into a Video
- Preparing Your Deck Before You Hit Export
- Recording Narration and Slide Timings
- Choosing Quality, Resolution, and Format
- Exporting and Reviewing the Finished Video
- When to Rebuild the Deck as Native AI Video Instead
Why Turn a PowerPoint Into a Video
The most common moment is simple. Someone finishes a deck, then realizes the audience won’t be sitting in front of PowerPoint at all. They need a file that plays on its own, can be shared easily, and doesn’t depend on the viewer having the original presentation software.
That’s where video export makes sense. PowerPoint can keep the original deck as the source while producing a shareable video version that’s easier to post, upload, or send. For teams that already built the content in slides, that’s often faster than recreating the whole thing in a video editor. It also means the .pptx remains the master file, so later edits don’t require a new shoot or a full rebuild.
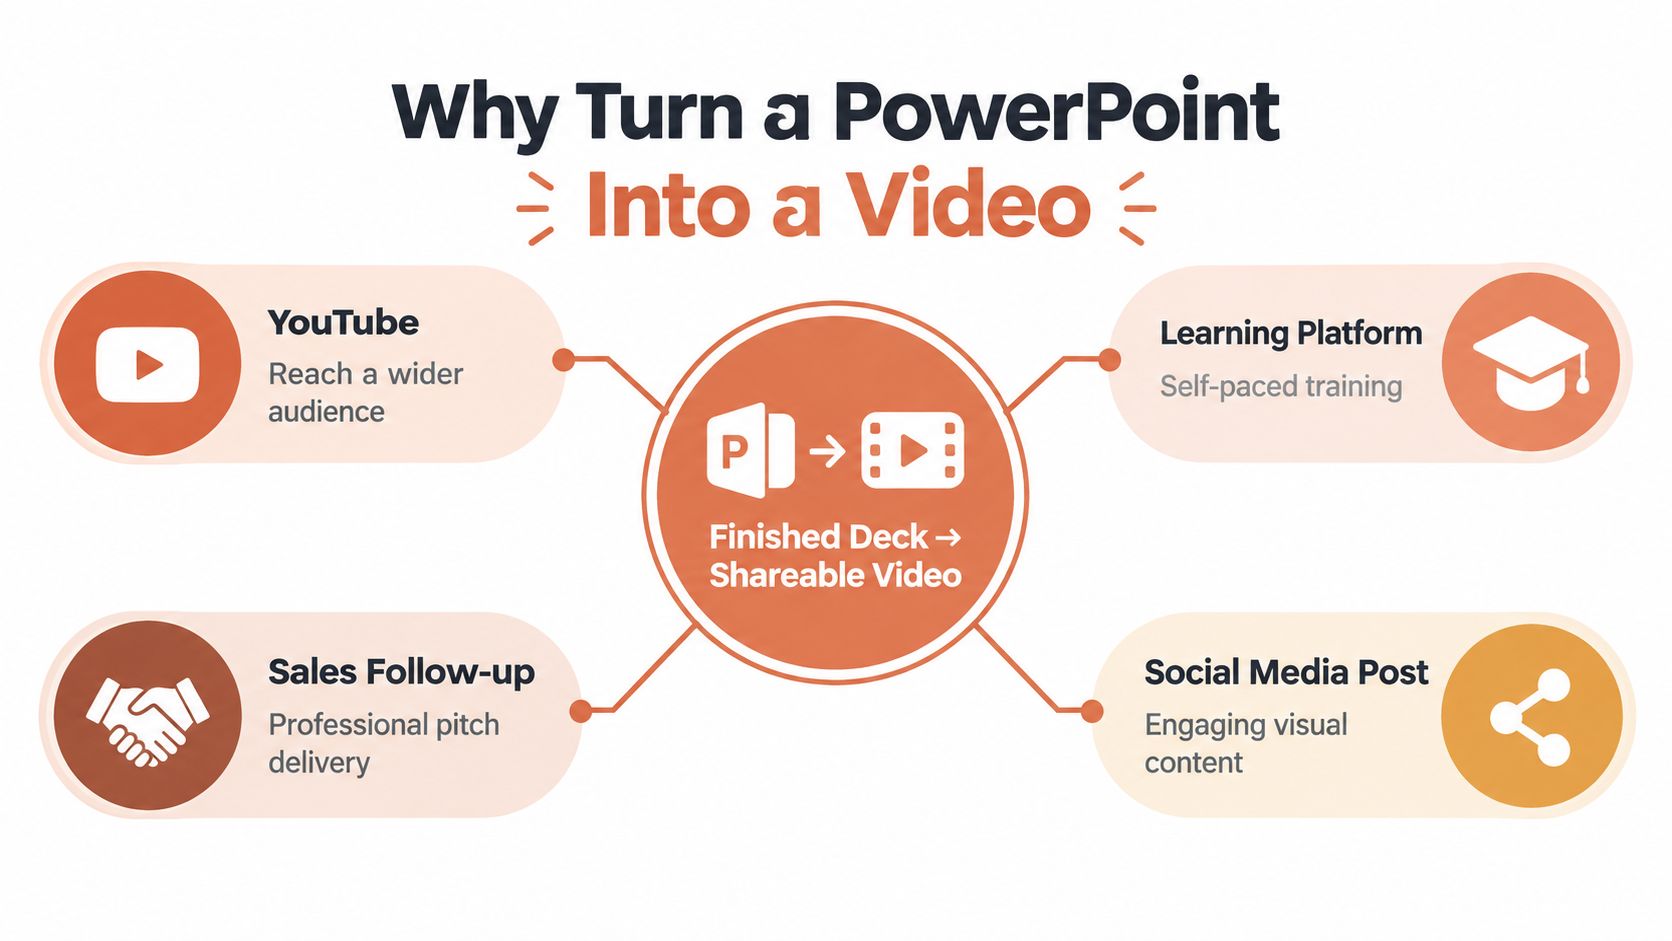
A practical way to think about it is this. The deck is the script, the export is the packaging, and the video is the delivery format. That works well for asynchronous training, sales presentations, product explainers, webinars, and repurposed social content. It’s a better fit when the slides already do most of the storytelling and you mainly need narration, timing, and portability.
Practical rule: export from PowerPoint when the slides already say what you need and motion is secondary. Rebuild the content only when the final piece depends on scene changes, character continuity, or heavier video storytelling.
If you’re aiming for a video-first distribution plan, it helps to think about the audience too. A deck turned into video can reach people who would never open a presentation file, and it can be reused in channels where slide navigation isn’t practical. For a related example of turning long-form ideas into publishable video content, see this guide to creating YouTube content with Claude.
Preparing Your Deck Before You Hit Export
The export button is easy to find. The cleanup work before it is what keeps you from exporting a video you’ll have to fix later.
Start with the slide itself. Check that your fonts look right on every slide, especially if you used a typeface that might not travel cleanly between devices. Then look at anything animated or timed, because PowerPoint can carry over motion, but only when you choose the right export options and the deck is set up properly.
Run a quick rehearsal first
Open the presentation in Present mode and do one pass from start to finish. Watch for slides that hang too long, jump too quickly, or depend on mouse clicks you won’t want in the final video. Also confirm that embedded media is present, because video and audio that live inside the deck need to survive export cleanly.
A few things are worth removing before you export. Speaker notes that are meant for you, not the viewer, shouldn’t accidentally become part of the script. Hidden clutter, backup slides, and anything that won’t make sense in a linear video should be cut or moved out of the main flow.
A good rehearsal catches the awkward parts before the file becomes harder to fix. If a slide feels confusing while you present it live, it’ll feel confusing in the video too.
When you’re ready, go to File > Export > Create a Video. PowerPoint will ask you to choose a video quality setting, decide whether to use recorded narration and slide timings, and then create the file. If you haven’t recorded timings, PowerPoint uses a default duration of 5 seconds per slide, and you can change that in the export settings. That default is a fallback, not a finishing touch.
If you want a related walkthrough on voiceover planning and captions, the CreativeClaw guide to adding captions and voiceover is a useful companion reference.
Recording Narration and Slide Timings
A video needs pacing. That means the question isn’t just “What do the slides say?” It’s also “How long should each slide stay up, and who’s speaking while it’s visible?”
Set the timing before you record
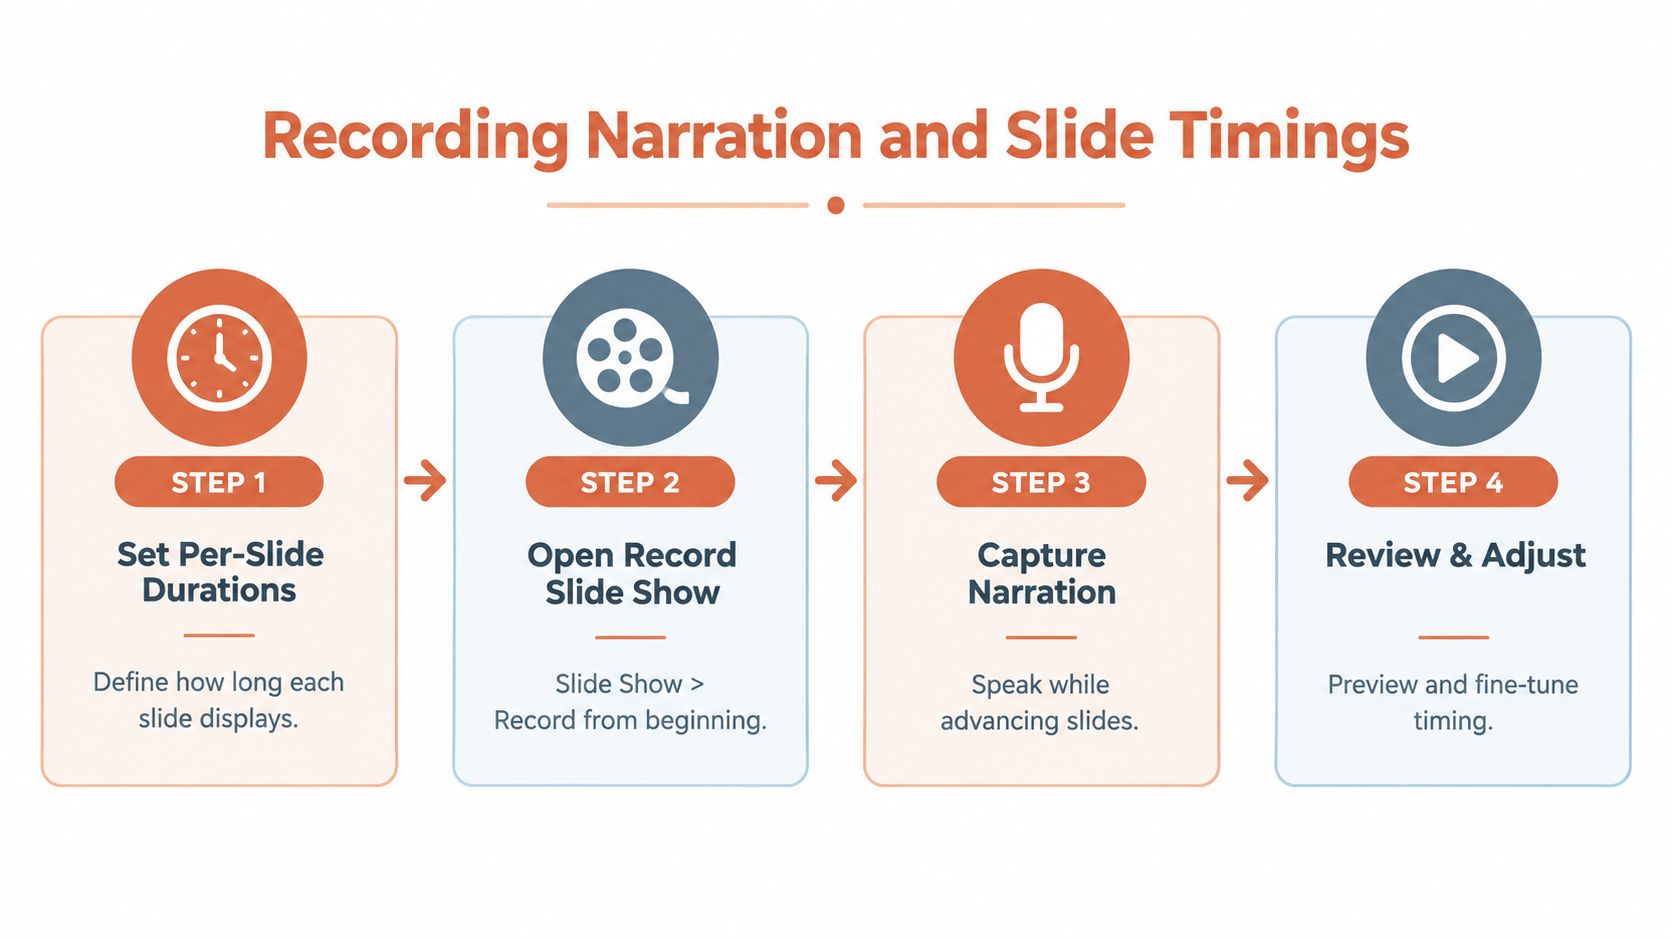
The most common mistake is leaving every slide on the same pace. Dense text slides need more breathing room than a title slide, and an image-only slide often needs less narration than a chart slide. If you use the export defaults without thinking, the video can feel rushed in one place and stagnant in another.
Go to Slide Show > Record Slide Show if you want to capture narration and slide movement together. PowerPoint lets you start from the beginning or from the current slide, which is helpful when you only need to redo a section. You can also rehearse timings first, then tighten or stretch individual slides afterward.
Make narration serve the slide
A slide video works best when narration explains what the viewer is seeing instead of repeating every word on screen. That’s the difference between a presentation someone can read and a video someone can follow. If the deck contains notes, turn them into clean spoken sentences before you record.
For a useful timing reference, the Voice Control Pro guide to timing is worth reading because it makes the pacing problem easier to think about in practical terms. Keep that idea in mind as you record. The goal is not to sound fast, it’s to sound clear.
After the recording pass, preview the slides again and listen for awkward gaps, clipped endings, or moments where the narration finishes long before the slide does. If one slide keeps dragging, split it into two. If a quote slide disappears too quickly, give it a little more time so the viewer can read it.
Tune durations slide by slide
PowerPoint lets you adjust durations in the export workflow, so you don’t need to re-record the whole deck just because one slide is off. That’s especially useful when a section contains mixed slide types. A title slide can move quickly, a data slide may need more time, and a closing slide often benefits from a longer hold.
If your deck includes voiceover, treat the timing track like a subtitle line. Every transition should feel intentional, not automatic. When the timing matches the narration, the result stops feeling like a deck and starts behaving like a video.
Choosing Quality, Resolution, and Format
Export quality is one of those settings people click past and regret later. The best choice depends on where the video will live, how much detail it needs, and whether compatibility matters more than appearance.
PowerPoint for Mac gives you four quality tiers, Ultra HD (4K), Full HD (1080p), HD (720p), and Standard (480p). A higher resolution usually means a larger file, so the right answer depends on the viewing environment. 4K fits archival masters or high-detail displays. 1080p is the practical default for most business, training, and marketing uses. 720p can keep files lighter. 480p only makes sense when bandwidth or storage is severely constrained.
Match the format to the destination
Microsoft recommends MP4 as the general-purpose container when it uses H.264 video and AAC audio, because that combination is designed for broad playback compatibility. On Windows, PowerPoint also supports WMV output. On Mac, you can export MP4 or MOV. If you expect the video to travel across common players, hosting sites, or internal learning systems, MP4 is usually the safest choice.
| PowerPoint Video Export Options at a Glance | Best For | File Size Impact |
|---|---|---|
| 4K | Archival masters, high-detail displays | Largest |
| 1080p | Training, business, marketing distribution | Moderate |
| 720p | Lighter sharing, faster uploads | Smaller |
| 480p | Strict bandwidth or storage limits | Smallest |
| MP4 | Broad playback compatibility | Varies by resolution |
| WMV | Windows-based workflows | Varies by resolution |
| MOV | Mac export workflows | Varies by resolution |
Compatibility first: if the video has to play cleanly on different devices and platforms, pick MP4 before you pick anything else. Then scale the resolution to the audience’s screen size, not to the highest number available.
If you’re comparing output types beyond PowerPoint, the guide to short-form video formats is helpful context for thinking about delivery, even if your source material starts as slides. The lesson is the same. A file format isn’t just a technical detail, it shapes where and how the video gets watched.
Keep the original .pptx too. If you need to revise branding, slide text, or accessibility elements later, the source deck is still the easiest place to make those changes before another export.
Exporting and Reviewing the Finished Video
Once the deck is ready, the actual export process is straightforward. Go back to File > Export > Create a Video, choose the quality setting, decide whether to use recorded timings and narrations, then create the file and save it in a place you can find again.
Name the file clearly before you forget what version it is. A clean filename saves time later when you’re comparing drafts or uploading to a shared folder. If you made a narration pass, make sure the option to use recorded timings and narrations is turned on, since that’s what lets PowerPoint preserve the pacing you just built.
Check the file like a viewer, not like the author
The first review should be on the device or platform where the video will live. A slide that looks fine on a large monitor can become hard to read on a phone, and a muted accent color can disappear on a projector. Watch for missing fonts, animation changes, and any audio that no longer lines up with the visuals.
Use this quick QA pass:
- Fonts and text: confirm the type doesn’t shift, clip, or render strangely.
- Animation and transitions: look for motion that changed direction, timing, or order.
- Audio sync: check whether the narration starts late, ends early, or overlaps the wrong slide.
- Readability: view the video at the target size, not just full screen on your desktop.
- Problem slides: if one slide keeps breaking, split it into two simpler slides instead of fighting the same layout.
If something looks off, fix the source deck and export again. That’s usually faster than patching the video after the fact. Re-embed the font if possible, adjust slide durations, or simplify one stubborn slide so it fits the playback format more naturally.
The assumption to challenge here is that every deck should become a straight export. Sometimes that’s exactly right. Sometimes it isn’t.
When to Rebuild the Deck as Native AI Video Instead
Some projects don’t want a slide export at all. A talking-head explainer, a product ad with a recurring character, or a short multi-scene film usually needs motion, continuity, and scene design that a static deck can’t provide on its own.
That’s where rebuilding as native video makes more sense. Instead of preserving each slide exactly, you turn the message into scenes, visuals, voice, and pacing designed for video from the start. For teams comparing that route, the CreativeClaw guide to the best AI video generation tools for 2026 is a useful starting point because it frames the decision around the type of video you need.
Choose export or rebuild based on the output
Use a PowerPoint export when the slides already do the visual heavy lifting and you mainly need portability. Choose native AI video when the final piece depends on character consistency, scene changes, or a more cinematic flow. A product ad with one recurring identity across scenes is a classic case where a direct export can feel too static.
CreativeClaw fits that kind of workflow because it lets you generate video, voice, and related creative assets inside the same conversation. A script can become a short ad with captions and narration, a still image can become an animated scene, and a multi-part concept can be built as separate visual beats without leaving the chat. That matters when the deck is really just source material, not the final format.
If the viewer needs to feel movement, not just read information, rebuild the asset as video instead of forcing the deck to do a job it wasn’t designed for.
The decision is simpler than it sounds. If you want the presentation preserved, export it. If you want a new video experience built from the idea inside the presentation, generate it as video instead.
If you want to turn slide-based ideas into polished video assets without wrestling with export settings or rebuilding every scene by hand, visit CreativeClaw and see how it can help you move from deck to finished video faster. It’s a practical way to handle narration, scene building, and brand consistency when PowerPoint export isn’t the whole answer.
Ready to try it?
Connect CreativeClaw to Claude in under a minute.
Get StartedContinue the workflow