Background Noise Removal for Audio and Video with AI
You’ve got a good talking-head take, but the air conditioner hums under every sentence. A phone-recorded interview has the right answers, yet traffic and room echo make the guest sound distant. Your product voiceover is clear enough to keep, but the hiss becomes obvious as soon as you raise the level for an ad.
That’s where background noise removal becomes a judgment call rather than a button press. The aim isn’t absolute silence. It’s speech that remains intelligible, natural, and believable on the device where people will hear it.
Table of Contents
- Why Background Noise Removal Rarely Works the Way You Expect
- Understanding the Noise You Are Dealing With
- Preparing Your Files for Clean Removal
- Removing Background Noise With AI Tools
- Judging Results Beyond a Lower Noise Floor
- Fixing Common Denoising Artifacts
- Post-Processing Habits and When to Stop Cleaning
Why Background Noise Removal Rarely Works the Way You Expect
The first cleanup pass often feels satisfying. The fan disappears, the waveform looks tidier, and the voice seems to sit closer to the listener. Then a consonant goes missing, the room suddenly sounds like a vacuum, or the speaker develops a watery, synthetic edge.
That happens because noise removal balances several competing goals:
- Cleanliness: reducing distracting hum, hiss, traffic, or clicks.
- Intelligibility: keeping words, consonants, and phrasing easy to understand.
- Naturalness: preserving the voice’s harmonics and enough room character to avoid a processed sound.
- Speed: producing a usable result without manually repairing every syllable.
Push cleanliness too far and you usually spend naturalness to buy it. A slightly noisy but convincing interview can work better than a silent track with missing word endings.
Practical rule: Clean until the noise stops competing with the voice, then stop before the processing becomes the most noticeable sound.
A producer’s workflow starts with diagnosis, not denoising. Identify whether the problem is steady hum, intermittent traffic, competing speech, wind, or reverberation. Prepare a standardized copy of the file, preserve the original, and create a before-and-after comparison before changing anything.
For an ad voiceover recorded beside a laptop, a moderate pass may remove the fan while leaving a small amount of room tone. For a field interview, the right result may retain distant traffic because removing it would also damage the guest’s consonants. For a talking-head clip, reducing echo can matter more than chasing a low-level hiss.
Modern systems make controlled experimentation easier, but they still need a clear target. Ask for a clean ad voiceover, an intelligible interview, or a natural talking head, not just “maximum noise removal.” The useful output is the version that serves the edit.
Understanding the Noise You Are Dealing With
A voiceover recorded beside a laptop fan, an interview hit by traffic, and a hallway clip full of slapback echo do not fail in the same way. If you run the same denoiser preset on all three, you usually get the same result too: less noise, and a voice that sounds thinner, phasey, or oddly smeared. Good cleanup starts with naming the noise correctly.
Match the processing to the sound
Steady noise includes air conditioning, microphone hiss, electrical hum, and computer fans. Because it stays fairly consistent, a tool can estimate a noise profile from pauses and reduce that pattern across the file. Spectral subtraction, introduced by Steven F. Boll in 1979, set up this frequency-domain approach by estimating noise during speech pauses and subtracting it from the signal. The historical overview of speech-enhancement methods also outlines Wiener filtering as another classical option for stationary or slowly changing noise. In practice, this is the easiest category to overprocess. A fan can disappear quickly, but so can breath detail and upper consonants.
Transient noise includes keyboard clicks, passing vehicles, door sounds, and notification beeps. Broadband denoising often misses these short events or dulls the whole line trying to catch them. Spot repair, spectral editing, or a localized AI pass usually works better.
Competing speech is tougher because the unwanted voice overlaps the wanted one in both frequency and timing. Separation tools can improve focus and reduce distraction, but they cannot reliably rebuild syllables that were fully masked. If two talkers collide on the same word, expect compromise.
Wind and handling noise create low-frequency surges, thumps, and broadband turbulence. A high-pass filter may tame rumble, but severe gusts can overload the mic before any restoration tool sees a usable signal. Once that happens, chasing a perfectly clean result usually sounds worse than leaving some residue.
Reverberation is the room continuing after the speaker stops. Dereverb can shorten the tail and improve clarity, but it cannot fully recover detail buried by reflections, clipping, or heavy compression. Consequently, goal choice becomes critical. For dialogue, better intelligibility may beat a dry but metallic voice.
Older speech-enhancement methods improved noisy recordings under the right conditions, but the result still tended to sound processed rather than studio-clean. Later neural approaches combined convolutional and recurrent networks and handled changing noise more effectively than fixed filters, as the same review notes. That helps with nonstationary backgrounds, but it does not remove the trade-off. More reduction still risks more damage.
Run a thirty-second diagnosis
Listen first to a quiet gap between words. If the background stays stable, you are probably dealing with steady noise. If it swells, shifts, or appears only around certain moments, you are hearing intermittent interference, movement, or room response.
Then turn the monitor level down and play one sentence. If the words remain clear and the background just pulls attention, light suppression may be enough. If consonants already disappear into the noise, set the goal to intelligibility or naturalness, not maximum cleanliness. A slightly noisier take often survives the edit better than an aggressively cleaned one.
Preparing Your Files for Clean Removal
A denoiser is only as good as the file you hand it. Bad prep hides what the tool is doing, and it makes weak processing sound better than it is.
Standardize before processing
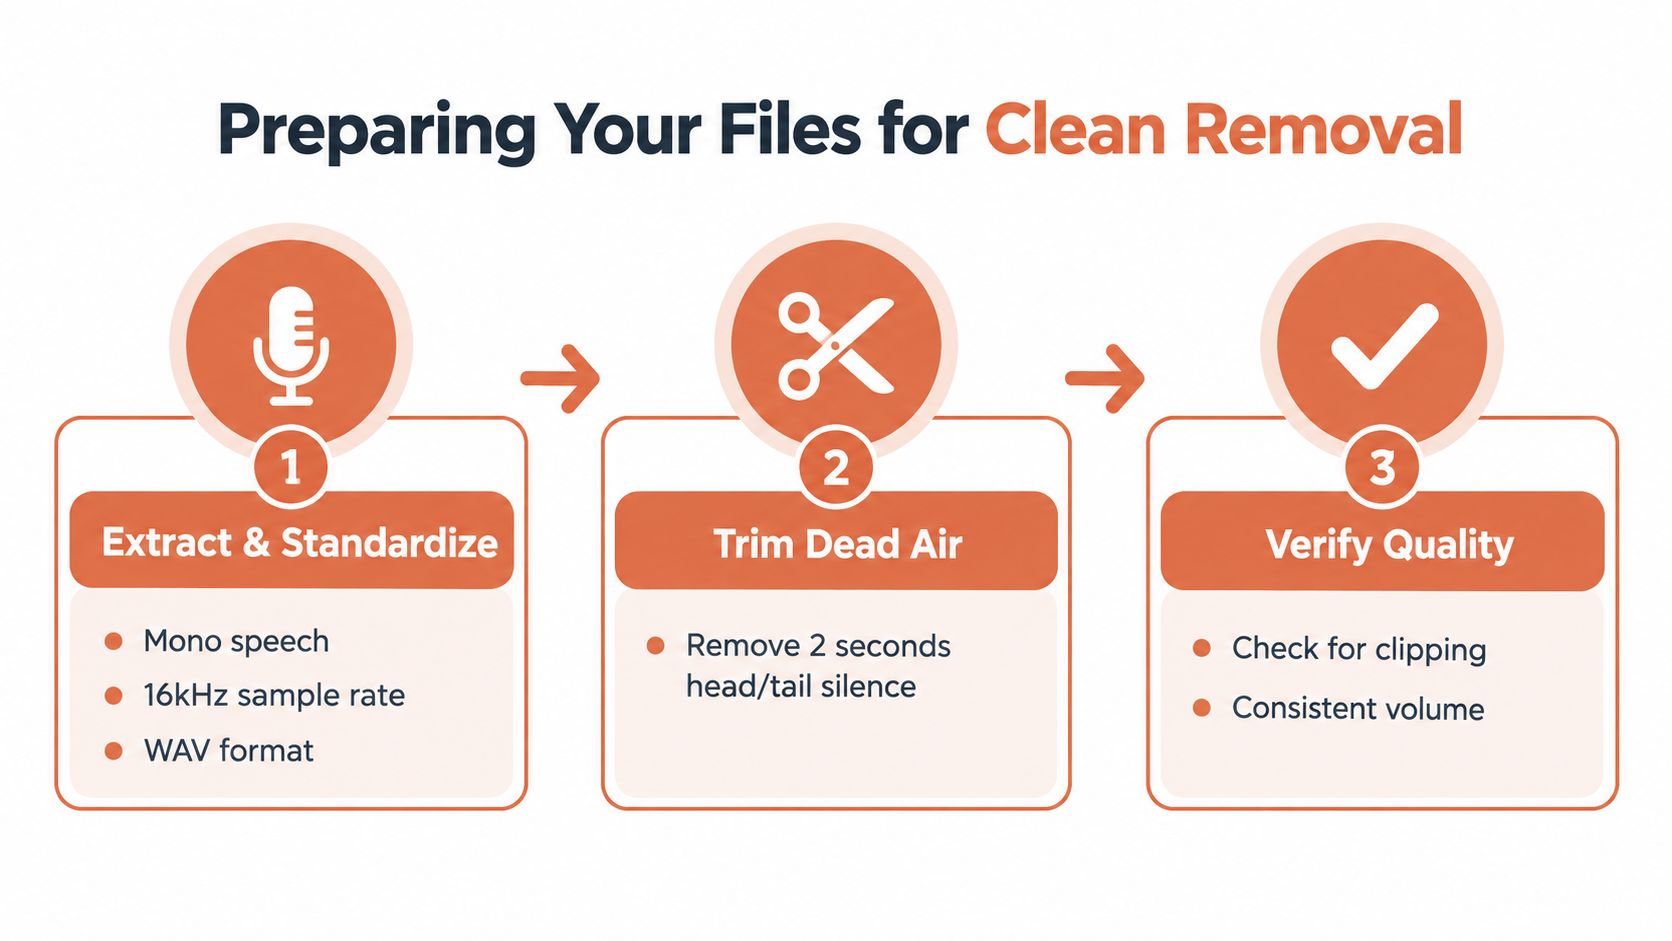
For speech-enhancement testing, a practical baseline is mono speech at 16 kHz, as described in the production evaluation workflow for speech enhancement. That does not mean every finished video should stay in that format. It means your comparisons should not be skewed by channel changes, sample-rate mismatches, or avoidable conversion artifacts.
Pull the audio out of the video, convert it to one consistent working format, and keep spoken dialogue centered. If the source is already a solid production file, do not downsample it just because a benchmark uses a smaller format. The goal is to remove variables, not throw away detail you may want later.
Trim dead air at the start and end, but leave a short quiet section if the recording has one. That snippet gives the tool a cleaner read on the background and gives you something concrete to compare before and after. Leave the natural pauses inside the performance too. Pauses expose pumping, chattering gates, and tone shifts faster than the spoken lines do.
If you want a very clean result, this step matters even more. If you want naturalness, it matters most, because the mistakes usually show up between words first.
Protect the source and create a test setup
Make an untouched copy before you run any AI cleanup. Heavy denoising is hard to reverse once the original is overwritten, and later in the edit you may need some of that room tone to match another mic, another take, or a camera scratch track.
Use file names that make comparisons obvious:
- Original: the untouched recording.
- Clean moderate: a restrained first pass.
- Clean stronger: a more assertive variant for difficult noise.
- Notes: the target, tool, strength, and sections that need attention.
For any recording that matters, export at least two cleanup versions. Match listening level before judging them. A louder export often wins the first impression even when the voice is thinner, duller, or more processed.
Review the results in two passes. First, do a controlled comparison on monitors or headphones you trust. Then test the same files in the true playback situation, with the kinds of noise and reverberation the audience will hear. The same production workflow recommends separating controlled evaluation from real-world tests. That habit keeps you from approving a preset that measures cleaner but makes the voice less believable once it leaves the edit bay.
Removing Background Noise With AI Tools
An AI workflow works best when you give it a production brief rather than a vague command. State what the listener needs to understand, how natural the voice should remain, and whether speed matters more than maximum separation.
Start with a reversible pass
Inside a chat-connected creative platform, connect CreativeClaw to the assistant, upload or reference the audio or video asset, and work from a copy. CreativeClaw can use ElevenLabs Voice Isolator for voice-recording cleanup involving background noise, music, and reverb. Keep the original asset outside the processing step so every experiment can be discarded without damaging the source.
For a laptop-recorded product voiceover, a useful prompt would be:
Clean the background noise from this product voiceover. Prioritize clear consonants and a natural close-mic tone for a short ad. Reduce laptop fan noise and low room rumble, but preserve subtle room ambience. Create moderate and stronger variants, keep the original untouched, and flag any words where speech detail is lost.
That instruction gives the assistant four useful constraints: the content type, the dominant noise, the desired sound, and the need for comparison. “Remove everything” provides none of them.
Compare variants instead of trusting one render
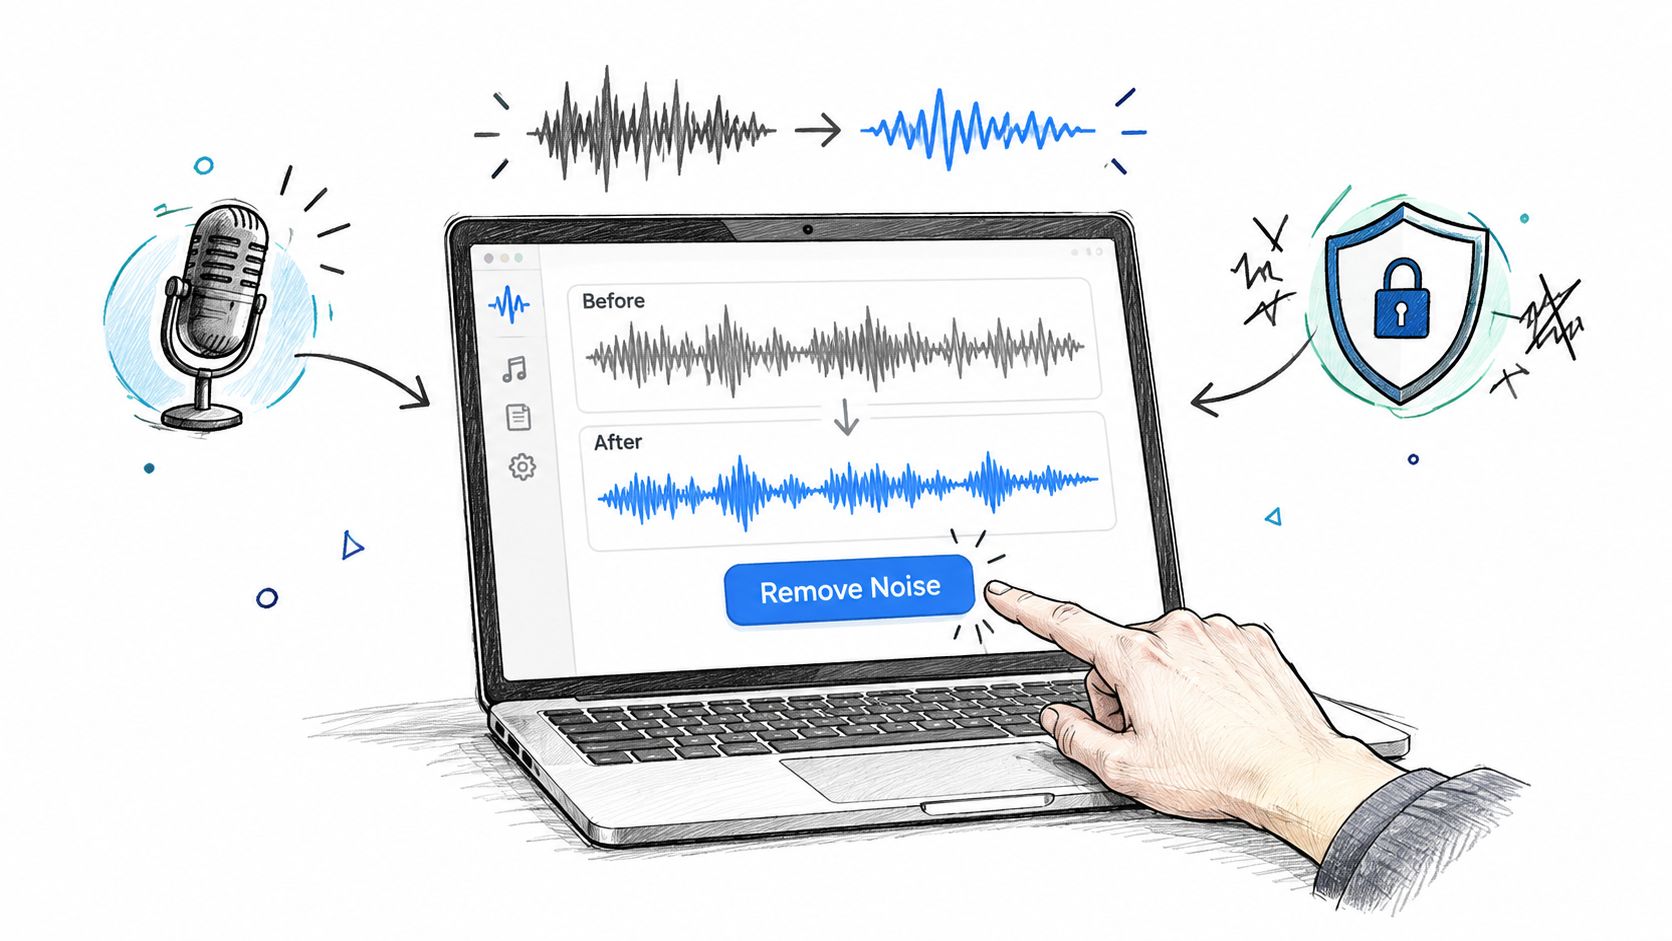
Ask for a restrained version and a stronger version, then compare the same phrase in each. Listen to quiet transitions, word endings, breaths, and any section where the noise changes. If only one sentence contains a passing truck, request a local repair for that segment instead of applying aggressive processing to the entire timeline.
For an interview, the brief might read:
Improve speech intelligibility in this phone-recorded interview. Reduce traffic and steady room noise conservatively. Preserve the speaker’s accent, consonants, and natural room tone. Return a moderate cleanup and a stronger cleanup, with the original retained for comparison.
For a talking head, you might prioritize continuity:
Reduce fan noise and room echo while keeping the voice natural across cuts. Avoid pumping between sentences and preserve enough ambience that edits don’t sound like silence.
If you need a manual reference for a conventional workflow, this guide to remove background noise from audio is useful for understanding the basic cleanup sequence before you automate it. For narration projects that also need a consistent speaker identity, keep voice cloning as a separate decision from noise repair and review CreativeClaw’s voice cloning walkthrough before combining the workflows.
The strongest process is iterative. Pick the better variant, identify the damaged moments, and rerun only those sections with lower strength or a different processing goal. This preserves the good parts of the first pass and prevents a difficult two-second noise event from dictating the sound of the whole recording.
Judging Results Beyond a Lower Noise Floor
A quieter file isn’t automatically a better file. Noise suppression reduces unwanted material, while enhancement aims to make the intended speech easier and more pleasant to hear. Those outcomes overlap, but they aren’t identical.
A file can show less background energy and still be harder to understand because the processor removed consonants, flattened harmonics, or introduced a watery texture. Evaluate the voice first, then decide whether the remaining noise is acceptable.
Use your ears like a producer
Play the original and processed files at the same apparent loudness. Check the following points:
- Word endings: Listen for final consonants in words with sounds such as “t,” “k,” “s,” and “f.” Missing endings reduce intelligibility even when the voice sounds clean.
- Quiet passages: Watch for a swirly, underwater texture or tiny tonal chirps between phrases.
- Sentence transitions: Pumping sounds like the background breathes in and out whenever the speaker pauses.
- Room continuity: A completely dead background can make edits feel pasted together, especially in a talking-head sequence.
- Listener effort: If you need to concentrate harder to follow the words, the cleanup failed its main purpose.
The deep-learning comparison on security-audio datasets reports PESQ rising from 2.1 to 3.8 and STOI moving from 0.65 to 0.91 under its cited conditions. STOI ranges from 0 to 1, or 0% to 100%, and the reported change equals an absolute intelligibility gain of 26 percentage points. The same report gives a 12.5-decibel SNR improvement, compared with 8.2 decibels for Wiener filtering and 9.4 decibels for Kalman filtering. These are benchmark results, not guarantees for a phone interview or ad voiceover.
PESQ and STOI help explain what researchers measure, but they shouldn’t replace listening on the intended device. A processor may improve one metric while producing artifacts that bother your audience. A slightly noisier take with intact speech, stable room tone, and believable dynamics often beats a cleaner take that sounds synthetic.
For searchable spoken content, transcription can expose a different failure mode. If the words are difficult to recognize, compare the cleaned file with the original transcript and consider CreativeClaw’s audio and video transcription workflow as a separate verification step rather than assuming a lower noise floor means better speech recognition.
Fixing Common Denoising Artifacts
You run noise reduction, the hiss drops, and the voice gets worse. That usually means the next move is not more reduction. Start by naming the artifact you hear, then back off the setting that caused it and test a short phrase again. Chasing a black background often costs the parts of speech listeners need.
Repair the voice before chasing silence
The cleanest result on a meter is not always the right result in a real edit. If your goal is naturalness or intelligibility, leave a little room tone before you hollow out consonants and strip the voice of its shape.
Aggressive suppression removes speech harmonics, soft consonants, and low-level ambience along with the noise. A safer approach estimates the noise power spectrum across multiple frames, tracks it during non-speech intervals, and limits updates while someone is talking. The ITU-T P.863.2 recommendation describes averaging degraded spectrograms over time for background-noise estimation.
In practice, three controls do most of the damage when pushed too far. The time-frequency gain floor, the amount of smoothing between adjacent frames, and voice-activity detection. Set them conservatively so quiet syllables are not treated as disposable noise.
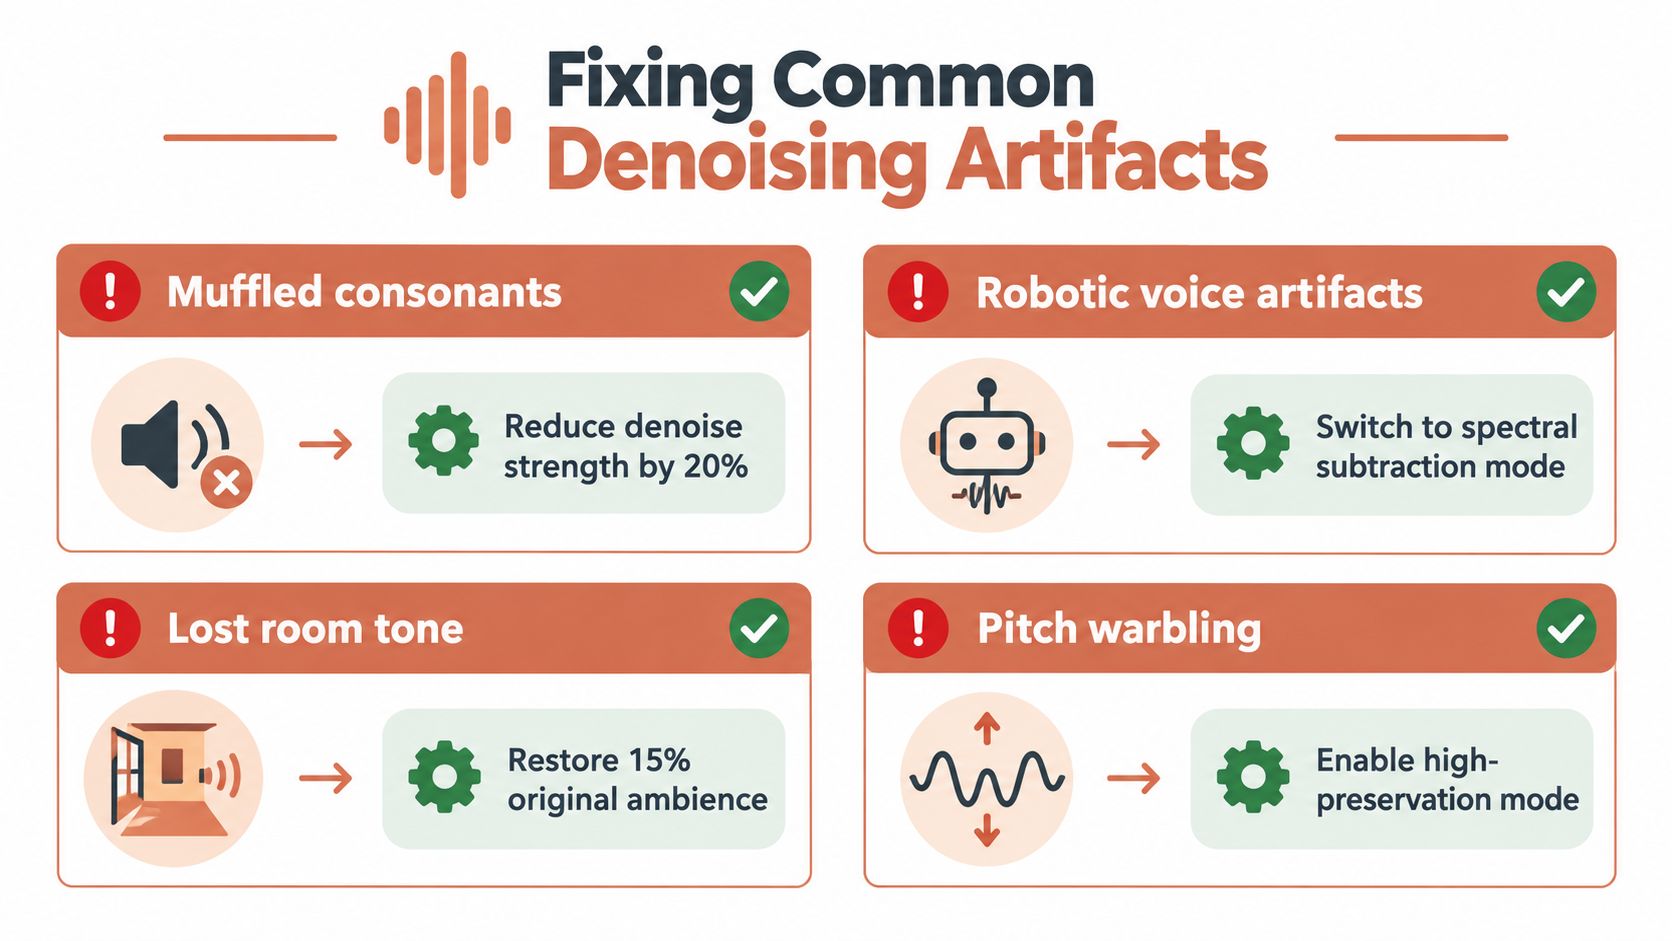
- Muffled consonants: Lower suppression strength and restore a touch of top-end detail. Check word endings and unvoiced sounds like “s,” “f,” and “t” before signing off.
- Robotic or hollow voice: Reduce speech reconstruction or enhancement intensity. The processor is often reshaping harmonics that were already usable.
- Musical noise: Warbling tones and random chirps usually come from narrow spectral cuts that change too fast. Increase smoothing, pick a gentler mode, or switch to a model that preserves speech better.
- Pumping: If the background swells and dips around pauses, the gain envelope is too obvious. Slow the response, reduce the depth of reduction, or keep a small ambience bed under the voice.
- Spectral holes: Missing bands in the voice mean useful frequency regions were removed. Raise the gain floor and compare sustained vowels as well as consonants.
- Clipped plosives: Denoising does not rebuild a distorted “p” or “b” that already clipped at the mic preamp. Repair clipping first when possible, then clean the noise gently.
Test the noise that actually caused the problem
A denoiser that handles fan noise can still fail on traffic, keyboard clicks, competing speech, or reverb. Test each one on its own. If speed is the goal, include latency, CPU load, memory use, and real-time behavior in the check, not just raw cleanup.
Then listen on cheap playback. Earbuds, laptop speakers, and a phone speaker reveal bubbling, sharp consonant damage, and pumping faster than studio headphones do. For many spoken-word jobs, a slightly noisier take that still sounds human beats an aggressively cleaned file that calls attention to itself.
Post-Processing Habits and When to Stop Cleaning
After denoising, make only the smallest finishing moves the recording needs. A gentle high-pass filter can reduce leftover rumble, while a restrained presence adjustment may restore some consonant definition. Don’t use EQ to compensate for a denoiser that already stripped the voice.
Normalize the finished level consistently with the surrounding edit, then listen through every cut. If a cleaned sentence drops into unnatural silence, place a small amount of matching room tone underneath it. The purpose is continuity, not adding noise for its own sake.
Language, accent, microphone distance, and room shape all affect the result. The research on deployable speech enhancement and real-world hearing conditions highlights why laboratory results may not predict benefits in changing environments. Test the actual speaker and intended audience, especially when the cleaned content will be heard in more than one language or accent.
Stop when the remaining noise no longer distracts on the target device. Every further pass has to earn its cost in naturalness.
For repeatable production, preserve three things: the untouched original, the cleaned master, and the processing settings or prompt used to create it. Keep the project editable rather than exporting a single damaged replacement. For a broader handoff that combines spoken audio with captions and voiceover, CreativeClaw’s voiceover and captions walkthrough can help keep those assets connected.
CreativeClaw lets you clean and refine audio inside a chat-connected creative workflow, including voice-recording cleanup for background noise, music, and reverb, while keeping variants available for comparison. Visit CreativeClaw to test a goal-driven background-noise workflow on your next voiceover, interview, or talking-head edit.
Ready to try it?
Connect CreativeClaw to Claude in under a minute.
Get StartedContinue the workflow